
This time I would like to give you an introduction to sausage making at home, as this is absolutely one of my favourite kitchen past-times. If you enjoyed this, perhaps you would like to try another post in the “introduction” series: an introduction to smoking food.
How I became Interested
My first foray into the wonderful (and messy!) world of sausage-making about 12 years ago, when I contacted a sausage-making supplier to learn a bit about the art. I decided to give it a go, so bought a “starter kit”, which consisted of a book covering all aspects of the subject, some casings for the sausages, a bag of rusk and a couple of different spice mixes. I already had the necessary mixer attachment for grinding and stuffing, so once the parcel arrived I joined the world of sausage making.
Admittedly my first attempts produced sausages of varying thickness that also contained a lot of air, but I soon got the knack of applying the right amount of pressure to the sausage mix in order to fill the skins and so created my first perfect (enough) Cumberland ring.
I have stayed with the supplier (Weschenfelder Direct) since their service has always been fast and reliable, and their product list continues to expand and improve. Here is their website URL, in case you are interested: https://www.weschenfelder.co.uk
Reality Check
To be absolutely honest, sausage making is a time-consuming process, and a couple of the steps are either fiddly or quite physical. I think it´s one of the most satisfying things to do, and when you taste your first home-made sausage, you´ll be blown away!
If you find you enjoy the process of sausage making, perhaps you´ll also like home-smoking. Maybe give this a try: an introduction to home smoking.
Let´s take a peek at what is involved in making your own sausages. You need the following basic ingredients:
Basic Ingredients of a “frying pan” sausage
- Meat (in the ratio of about 70% lean to 30% fat). This can change, but it´s not a bad starting point. I recommend you use pork for your first try.
- Yeastless bread rusk
- Water
- Seasoning (the supplier above has dozens of different seasoning packs)
- Casings (sheep casings are most commonly used for “normal” type (thinner) sausages, whereas pig (hog) casings are used for speciality (thicker) types. These have to be soaked for a couple of hours minimum in cool fresh water, and then rinsed thoroughly a number of times in order to remove all traces of the salt they were packed in.
Note:
Before we start, a word of caution: hygene is VERY important when making sausages from scratch (as it is with any raw meats). Wash your hands thoroughly after handling raw ingredients, and wash down surfaces with an antibacterial liquid after use.
Also, use only fresh ingredients, and no frozen ones.
Gourmet Italian Sausages
I made some Gourmet Italian sausages recently, and used the following:
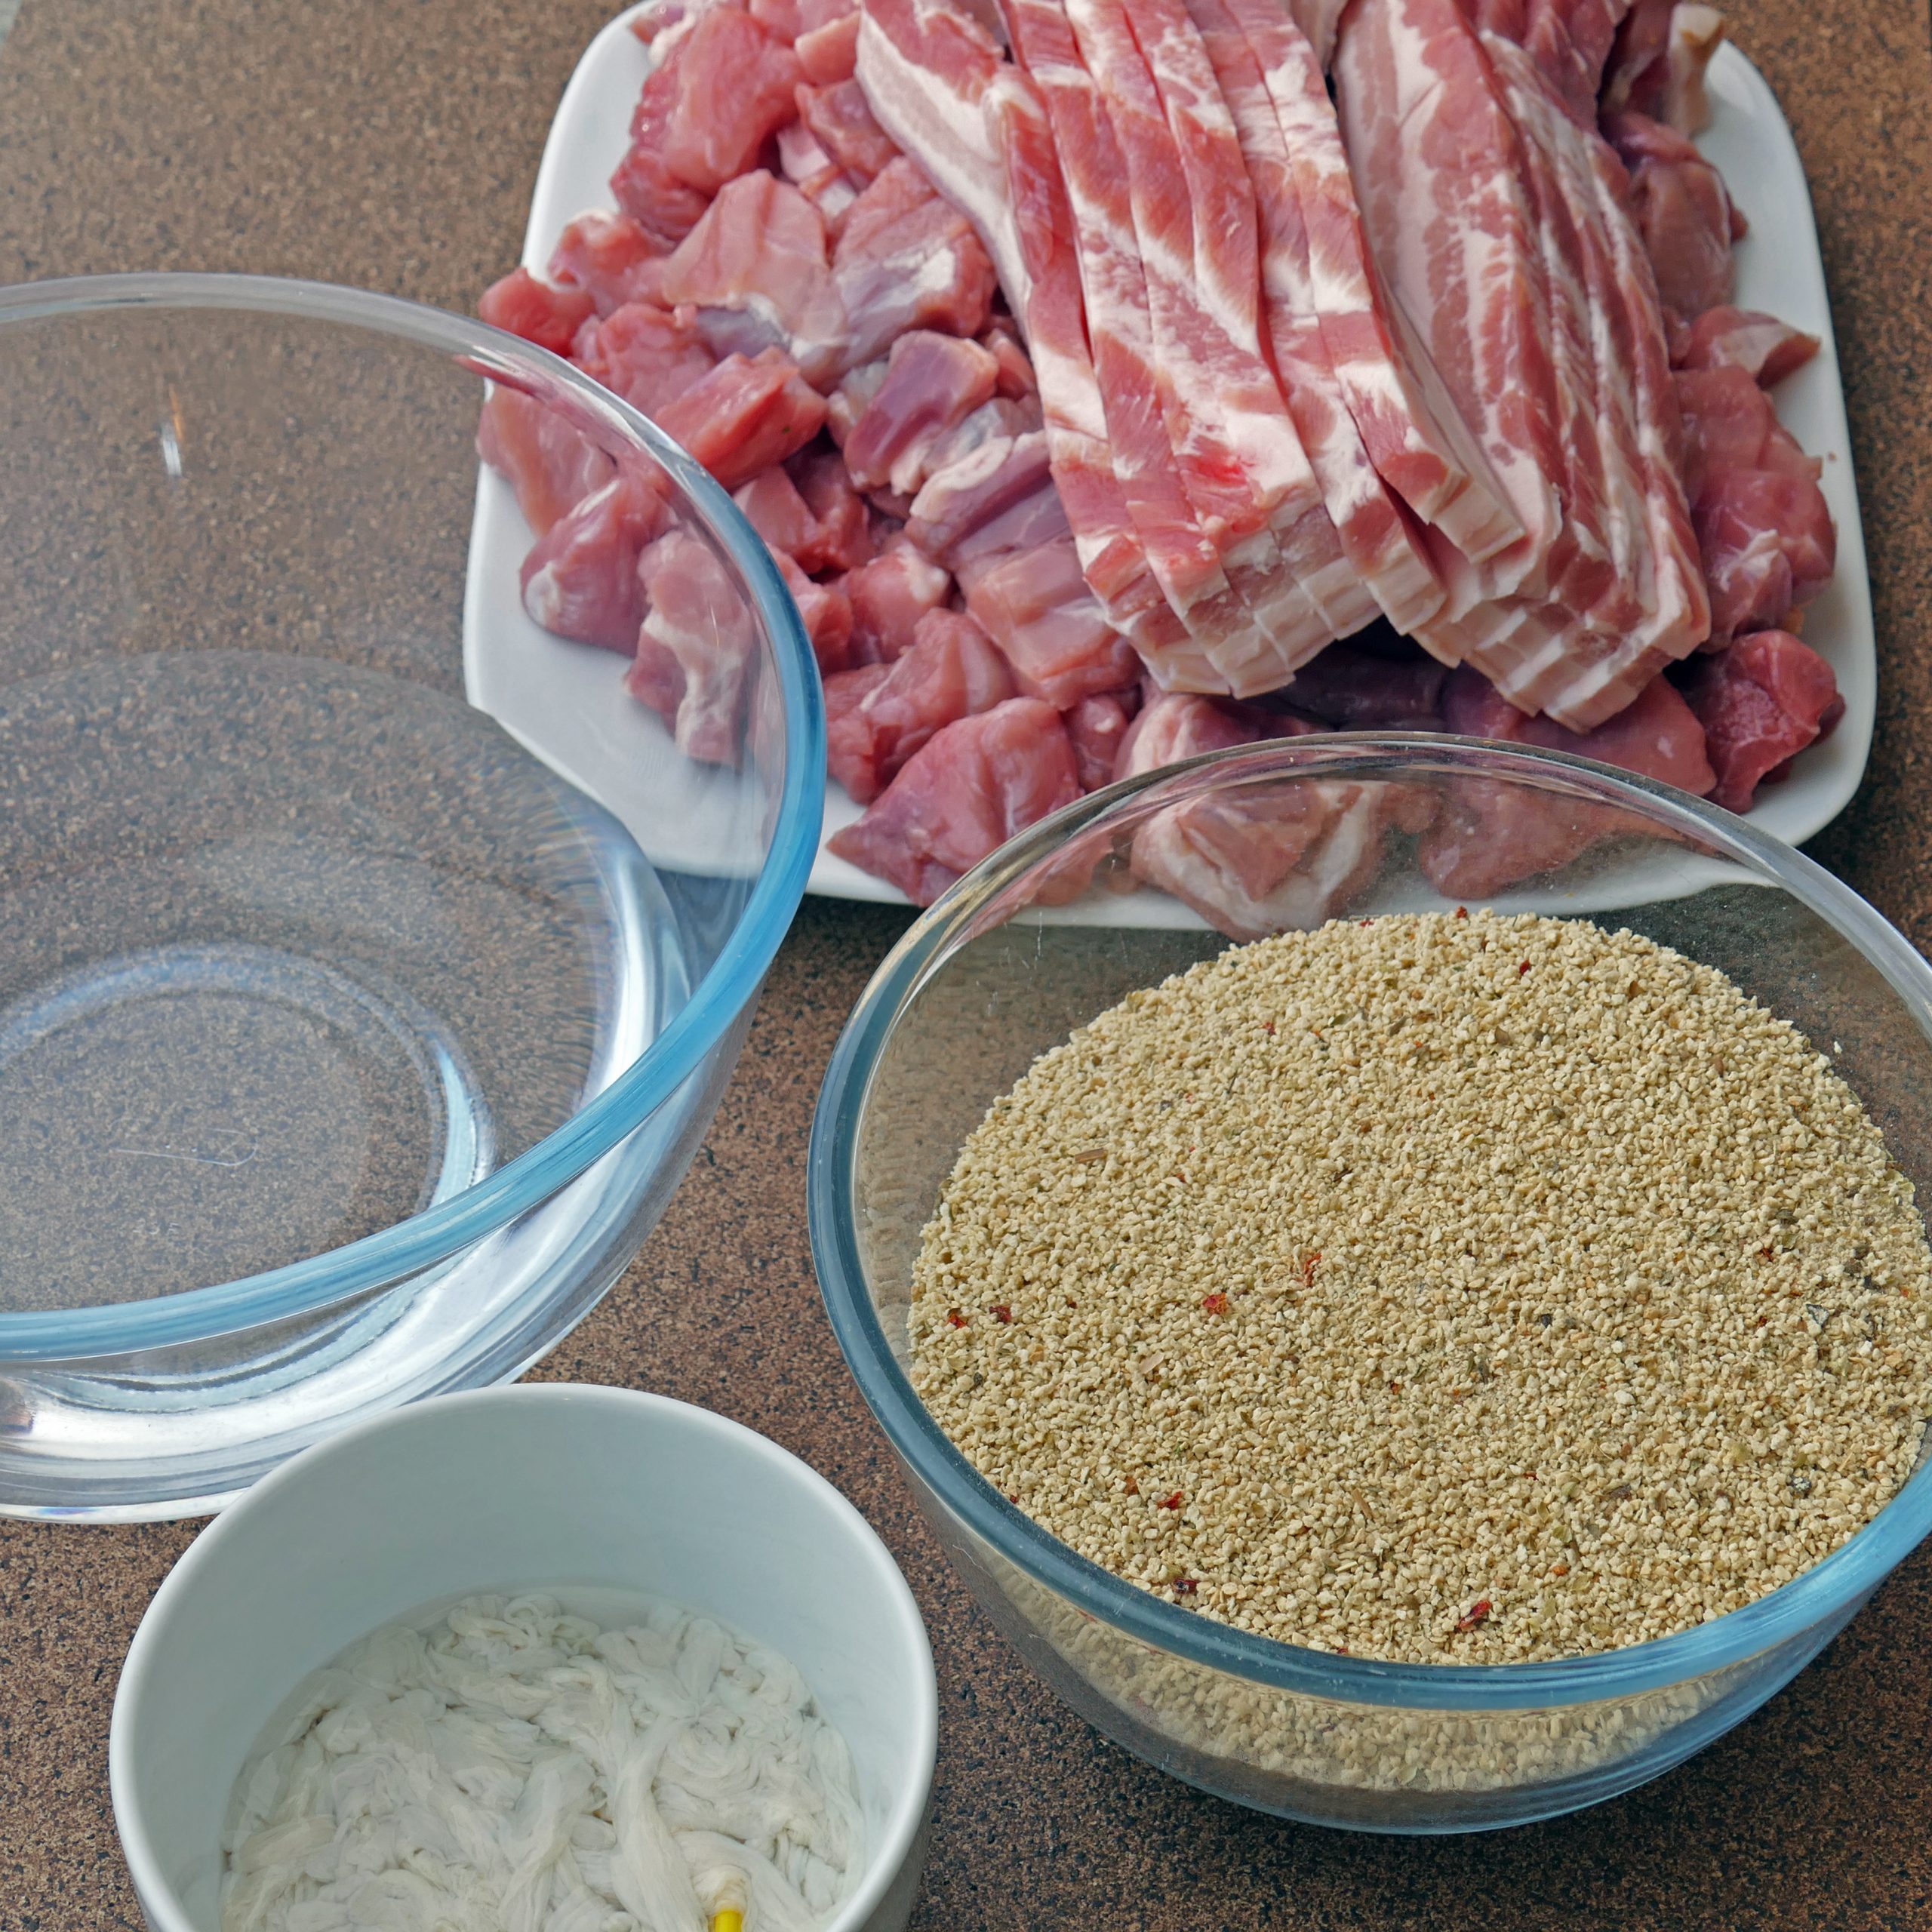
Ingredients (makes 2.5kg of sausages)
- 1.5 kg cubed pork
- 0.6 kg belly pork (pancetta)
- 0.5 kg yeastless rusk
- 5 metres sheep casings (allows for breakages)
- 0.5 kg water
Method
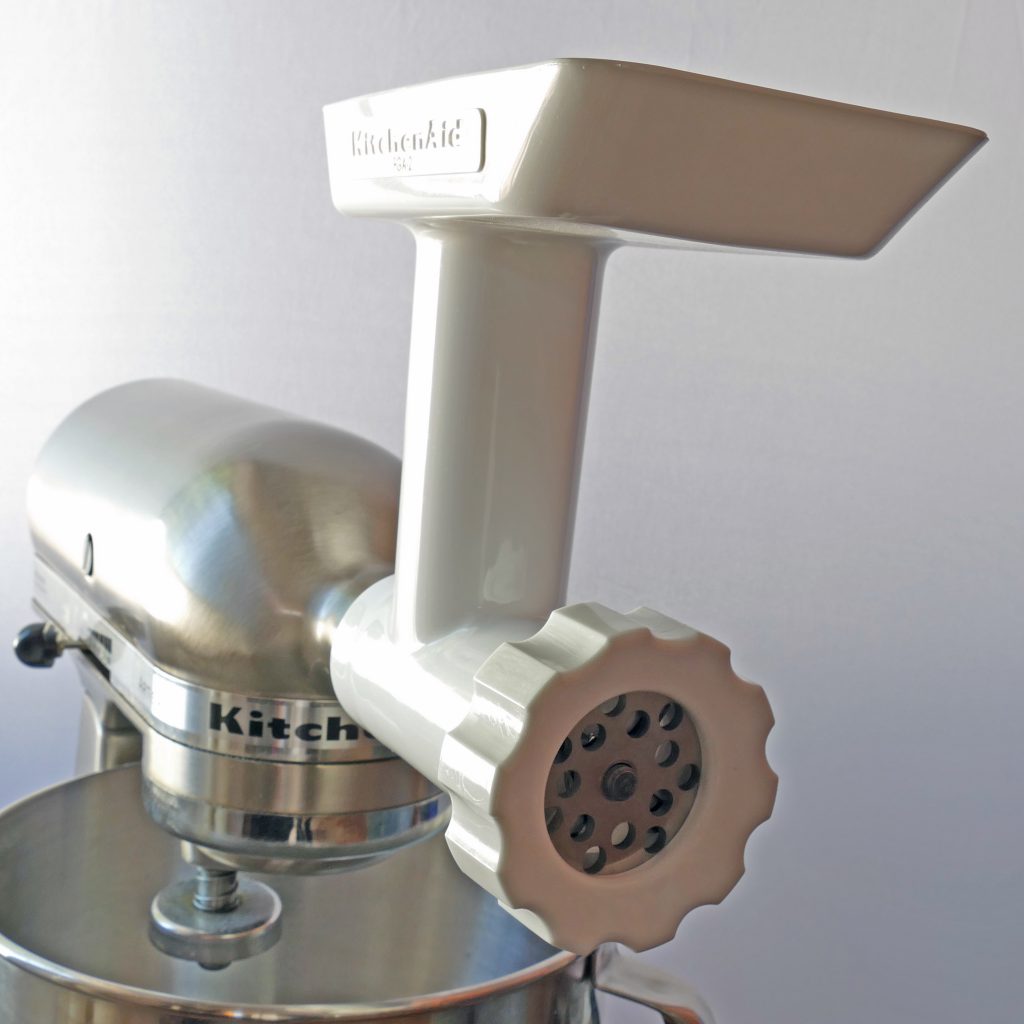
- Set up your mixer with the grinding attachment.
2) Grind the meat and fat (using a course grinding plate).
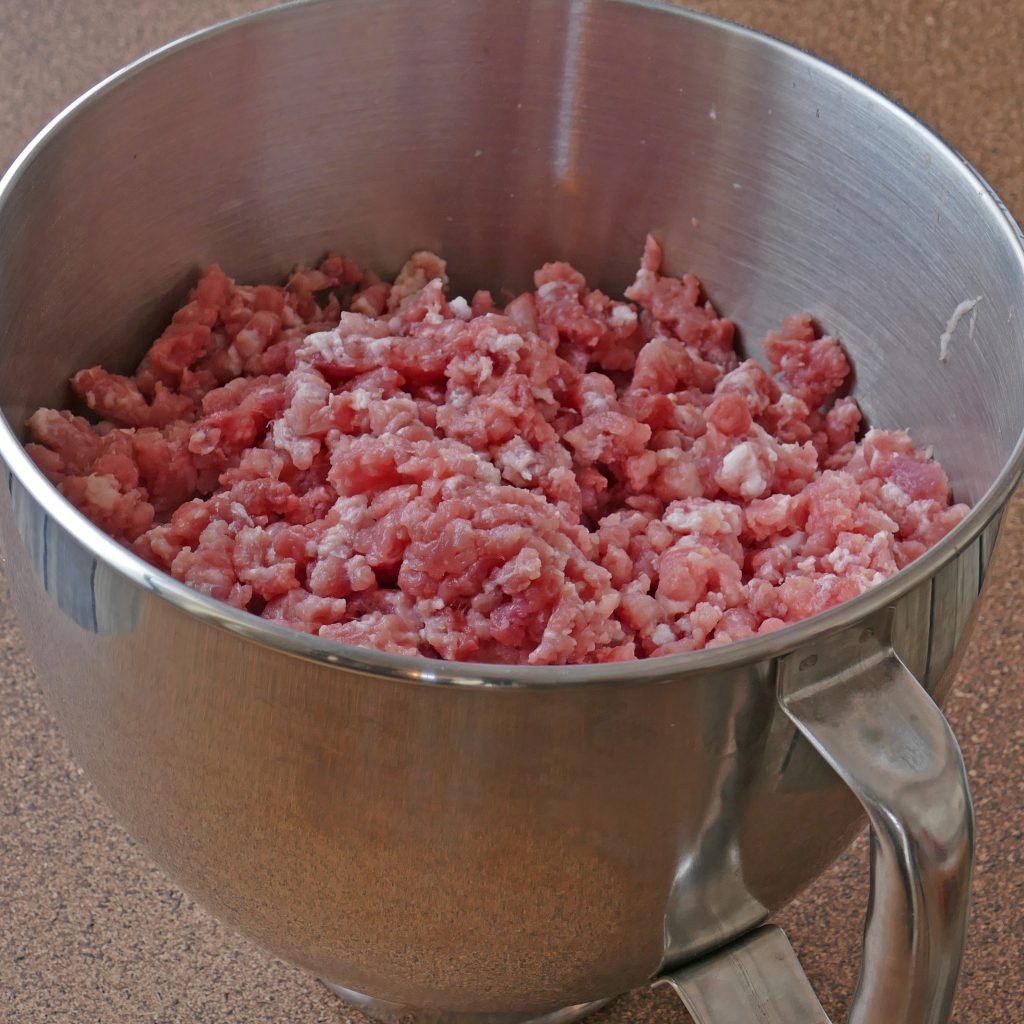
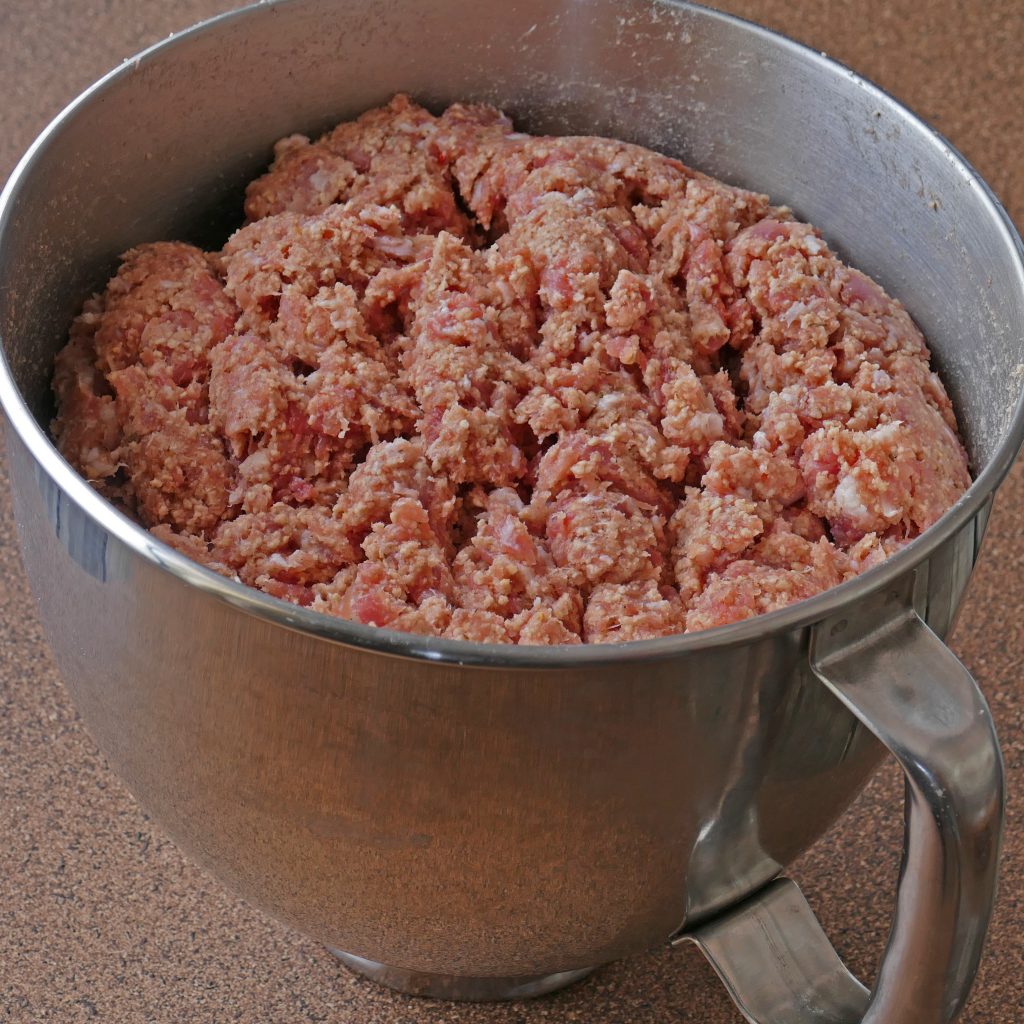
3) Mix in the yeastless rusk mix (“Complete Gourmet Italian mix”).
4) Add the water then mix well.
5) Remove the grinding plate and blade and attach the relevant sausage stuffer tube (narrow for sheep casings or broader for hog´s casings).

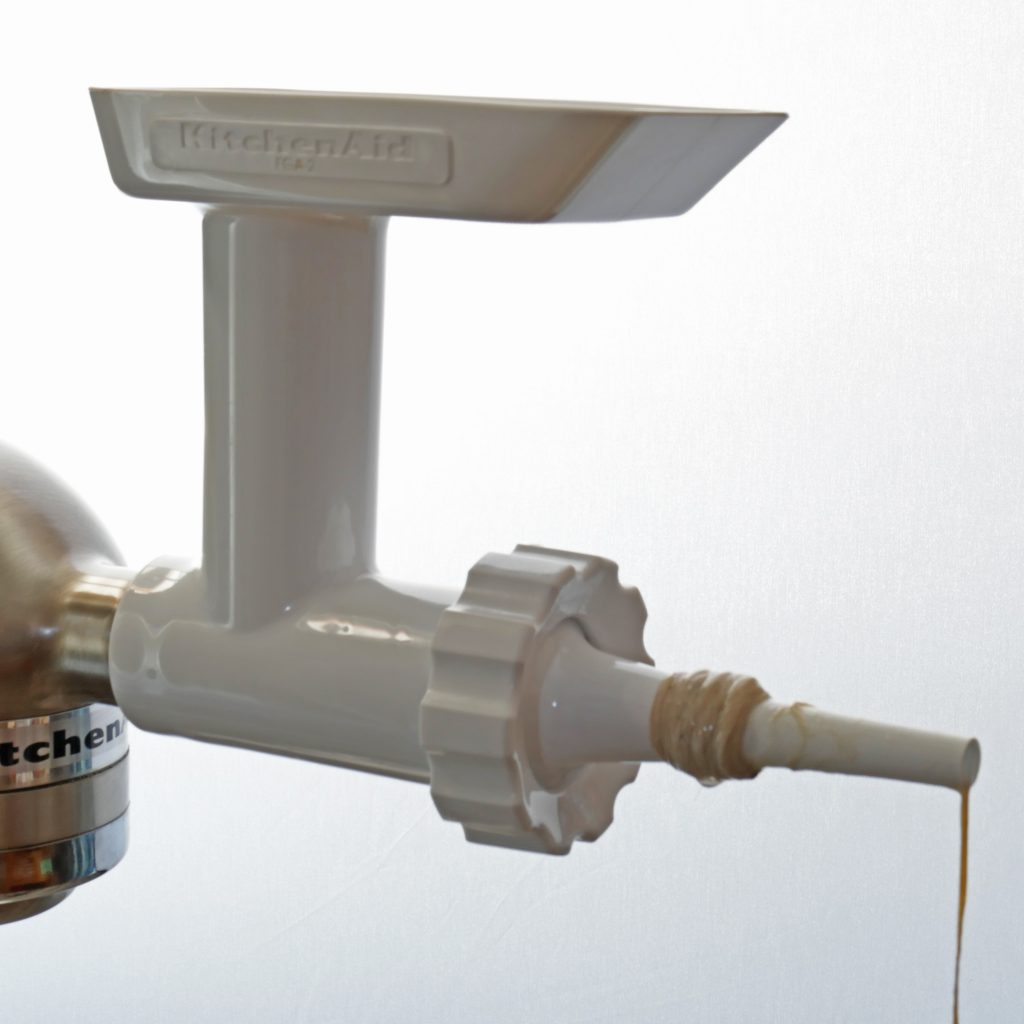
6) Rub a little olive oil on to the stuffer tube, to make loading the casing easier.
Now comes the difficult part!
7) Find the end of the skin and carefully place over the tube, pushing it all the way on, and gently continue with the rest of the casing, leaving a small piece hanging from the edge. Don´t tie the end, as air needs to be forced through it.
Note: for those with “sausage fingers” like me, you may need to ask someone to help you feed the open end on to the stuffer tube.
8) Start feeding the sausage mix into the hopper, using the stomper to force the mix in (don´t use your fingers!). This is quite arduous, but its important to maintain a little pressure on the meat, to prevent air getting in.
9) When the mix starts to come through, just cradle the casing in your hand, and allow the pressure of the sausage mix fill the casing and it will also pull the casing off of the stuffer tube as it fills.
Don´t worry if the casing splits. You can just tie it off there, either with the casing itself, or with a small piece of cooking twine (string).
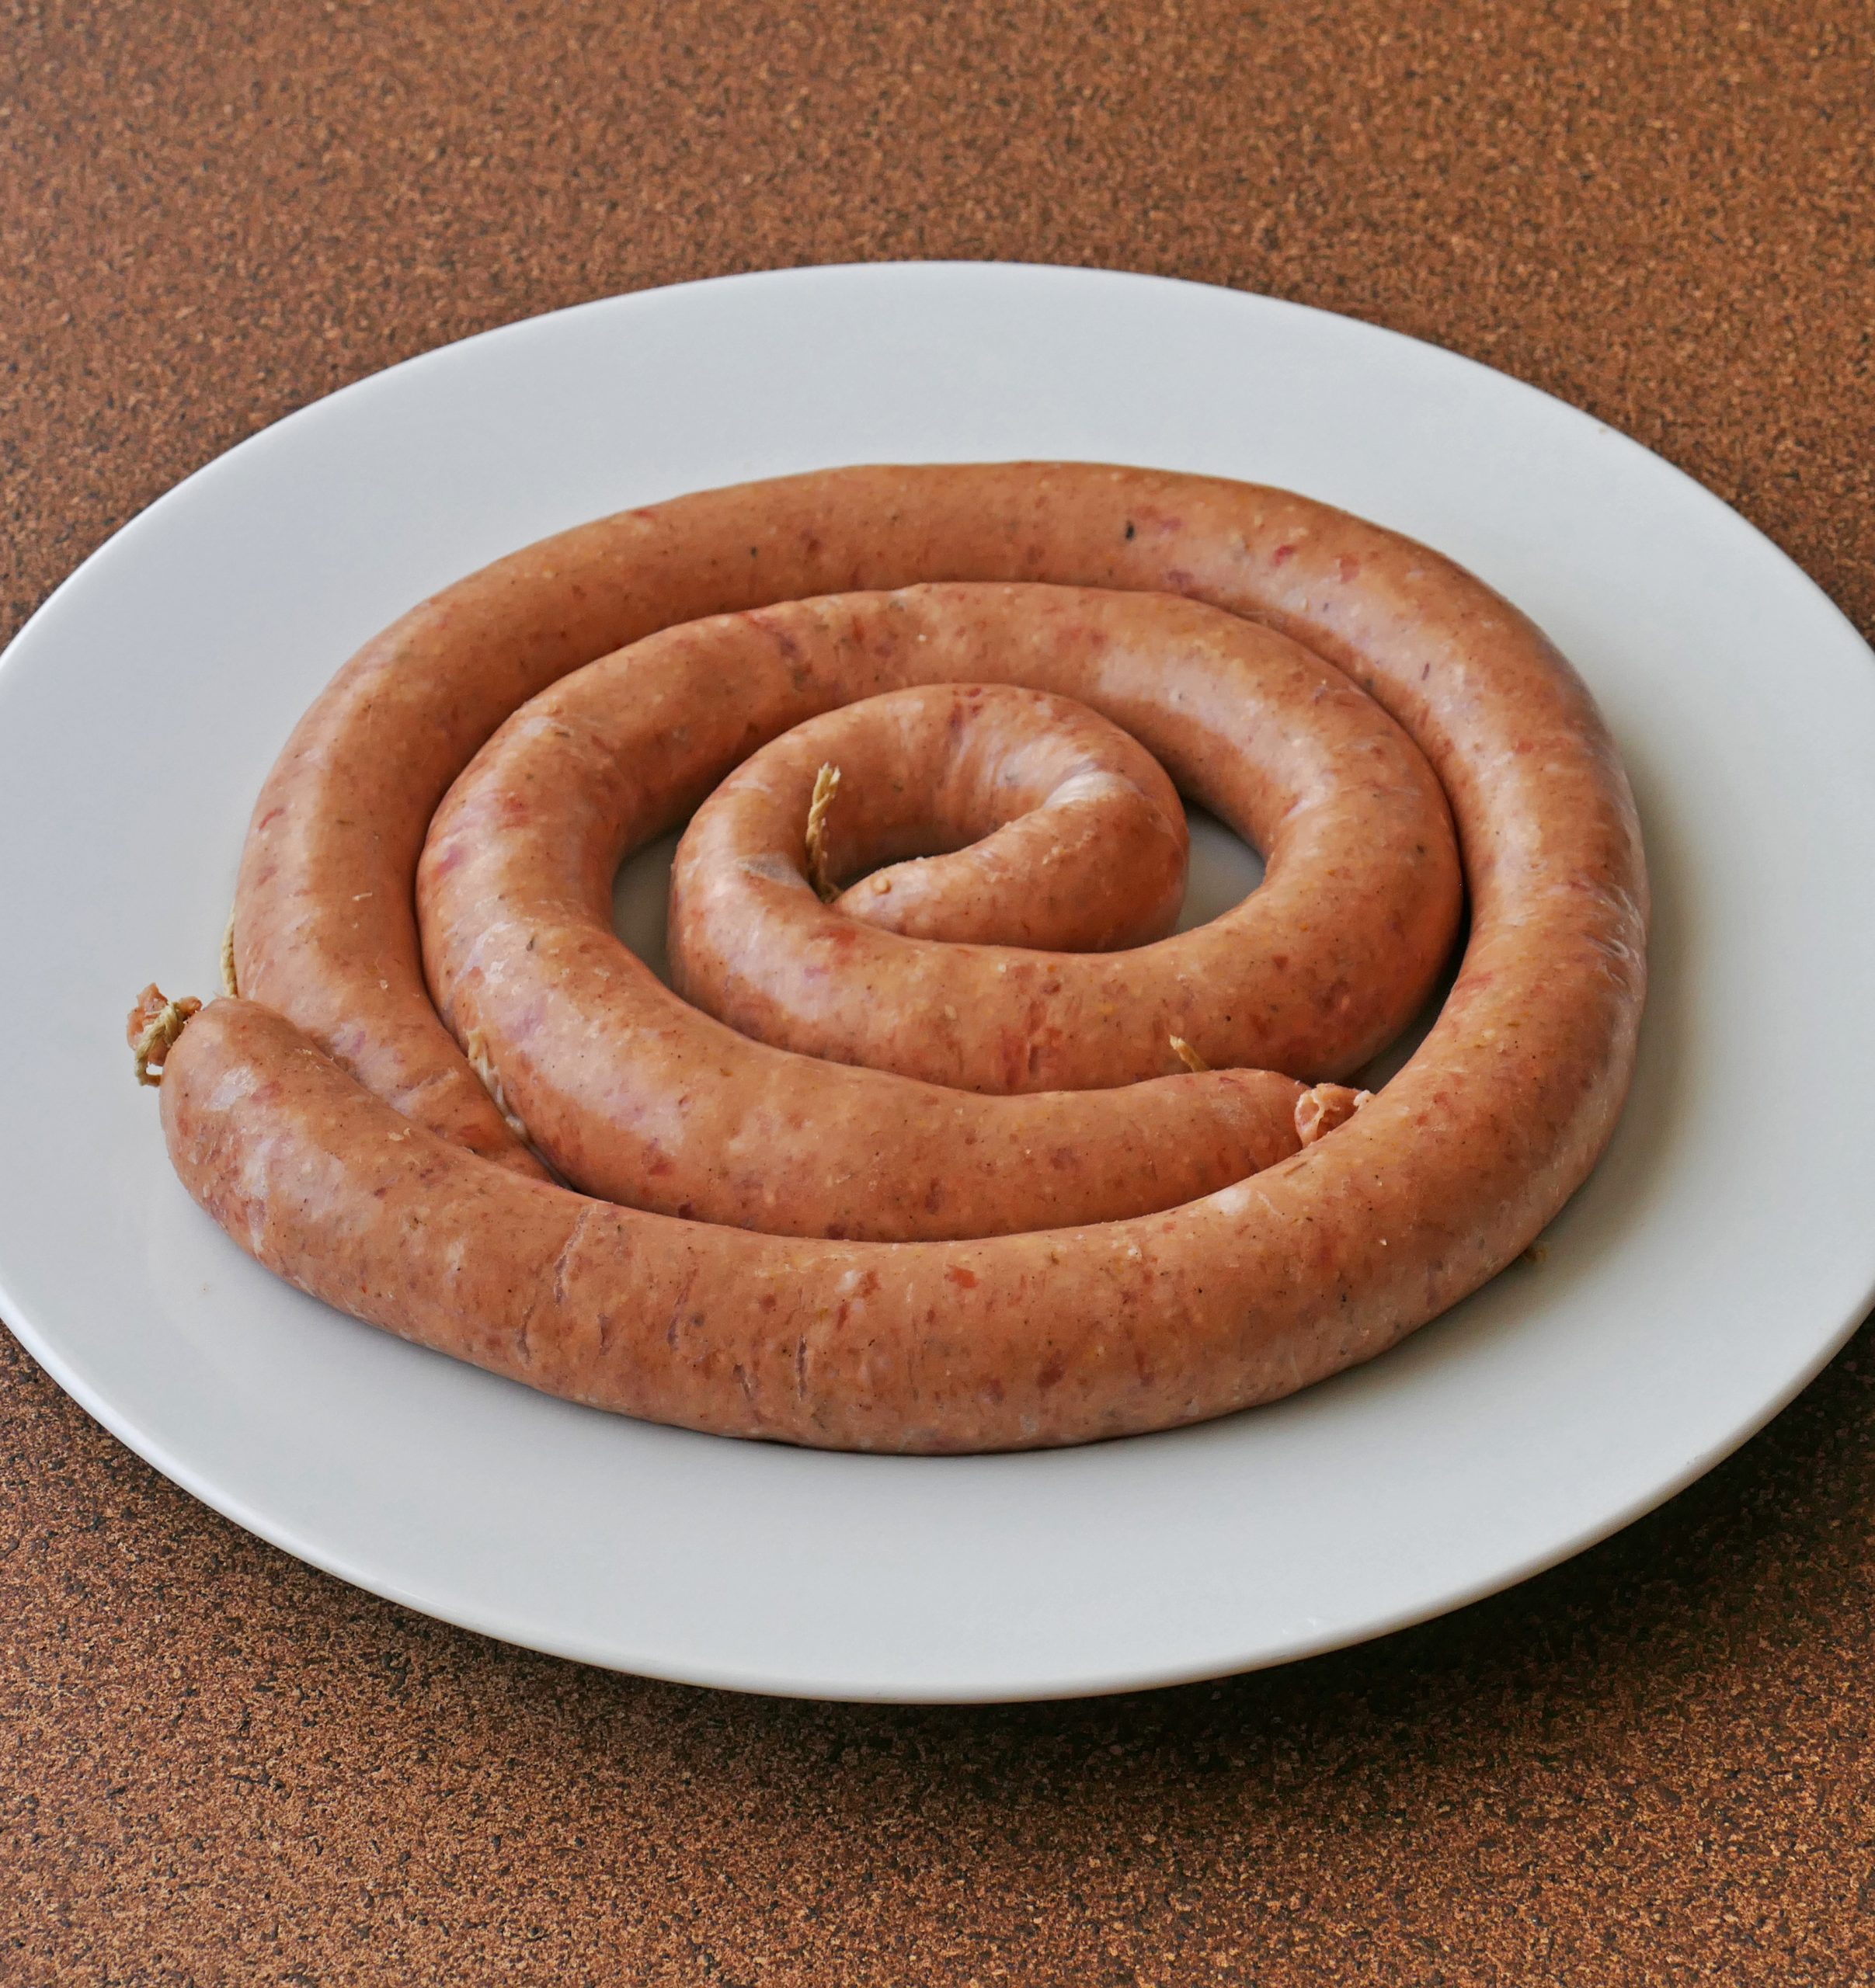
10) You can either keep the sausage long (as with Cumberlands) or link them together. I´ve not had a lot of luck with linking yet, but hopefully at some time in the future I will improve.
That´s it, as far as my introduction to sausage making goes . Home made sausages!

We will be using home-made sausages in a few future posts. They are simply the most delicious you can have. I think they are best fried, or browned then cooked in red wine.

I hope you´ve enjoyed this introduction to sausage making.
OK, so the last photo is a bit daft! I always smile when I´m eating home-made bangers. They are just sooo good! Until next time.